How To Change AirPods Pro Ear Tips: A Comprehensive Guide For Every Earbud Enthusiast
So, here's the deal. If you're reading this, chances are you've got a pair of AirPods Pro and you're wondering how to switch out those tiny ear tips. Don't sweat it, because you're not alone. Changing AirPods Pro ear tips is one of the most common queries among Apple fans, and trust me, it's easier than you think. Whether your ear tips are worn out, lost, or you just want to try a different size for comfort, we've got you covered. Let's dive in and make sure your AirPods Pro game stays strong!
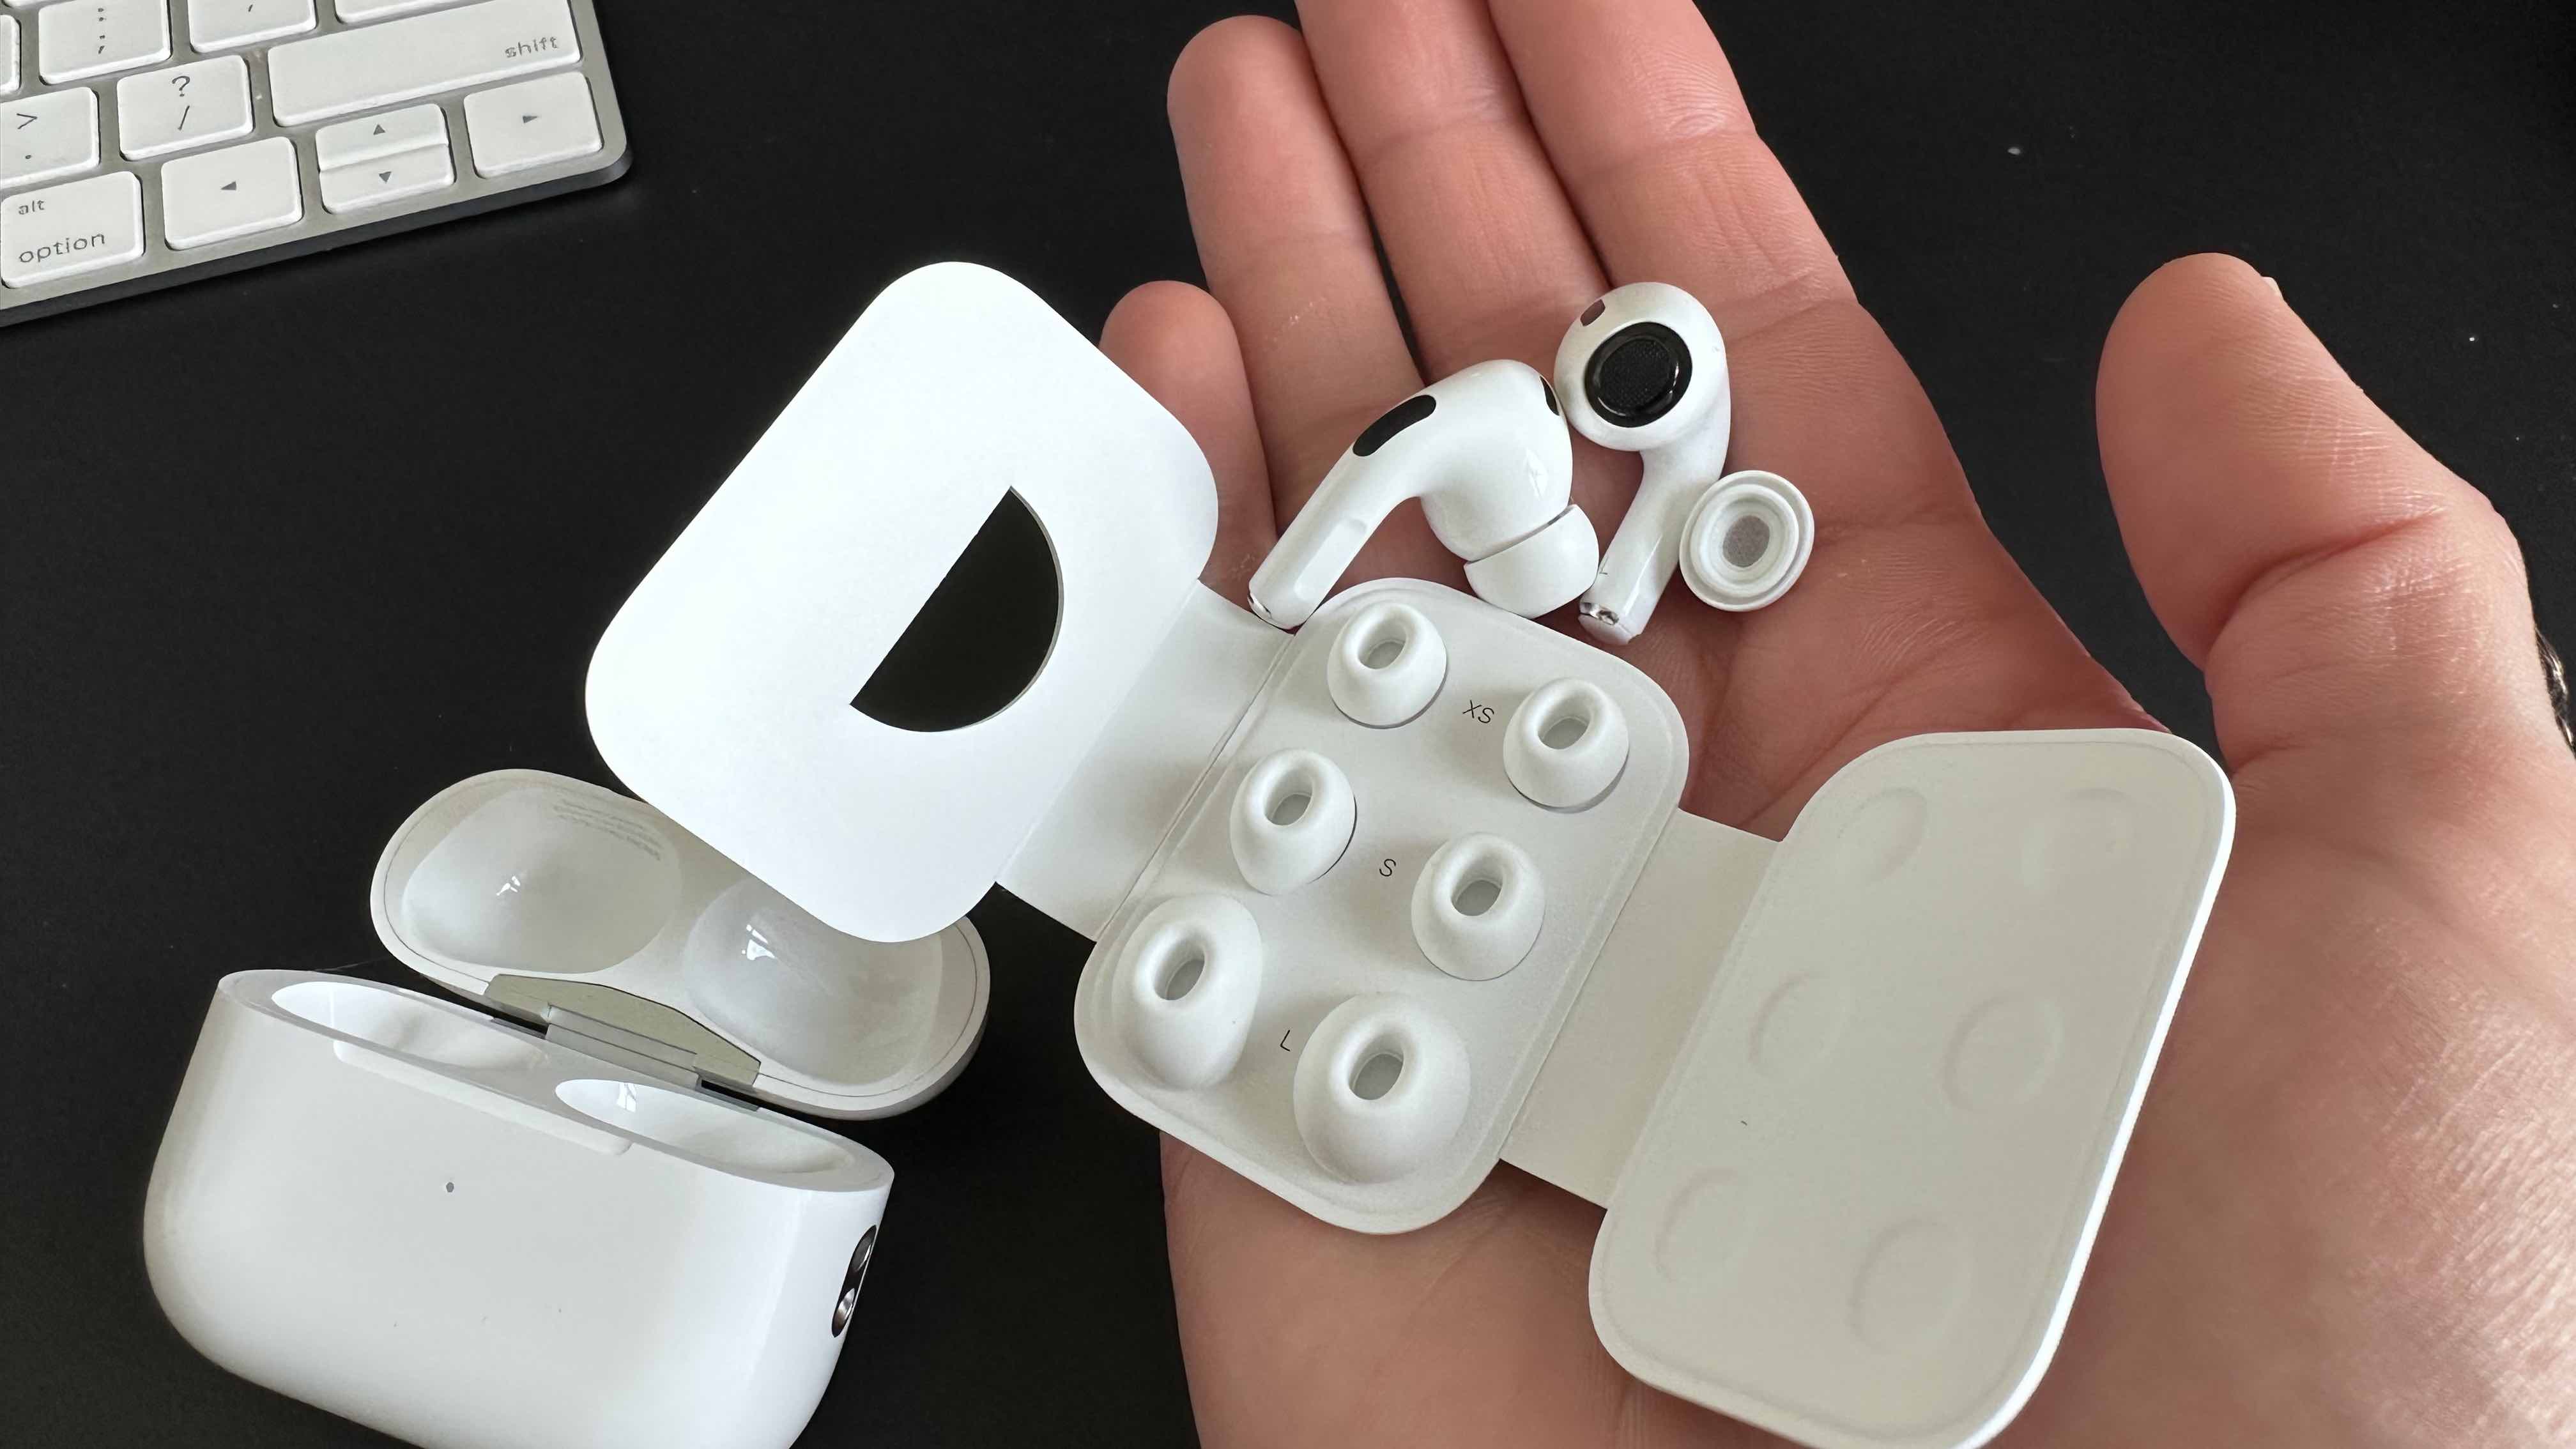
You might be thinking, "Why do I even need to change these ear tips?" Great question! The ear tips on your AirPods Pro play a crucial role in sound quality, comfort, and even noise cancellation. If they're not fitting right or are clogged with earwax, your listening experience can take a hit. Plus, Apple gives you options—small, medium, and large—so you can customize the fit to your ears. It's like picking the perfect pair of shoes for your feet, but for your ears!
Now, before we get into the nitty-gritty, let me clarify something. This isn't rocket science. You don't need any fancy tools or years of experience to change your AirPods Pro ear tips. With just a little know-how and a steady hand, you'll be swapping them out in no time. Ready to level up your AirPods Pro skills? Let's go!
Here’s the quick roadmap for this guide:
- Why You Should Change AirPods Pro Ear Tips
- Tools You’ll Need
- Step-by-Step Guide to Changing Ear Tips
- Common Issues and How to Fix Them
- Tips and Tricks for Better Ear Tip Care
- Exploring Alternative Ear Tips
Why You Should Change AirPods Pro Ear Tips
Alright, let's talk about why changing your AirPods Pro ear tips is such a big deal. First off, comfort is king. If your current ear tips aren't fitting snugly, you're probably feeling some discomfort after a while. No one wants sore ears from a long listening session, right? Besides, the right fit ensures better noise cancellation and sound quality. Without a proper seal, those bass notes you love might sound a little off.
Another reason to switch them out? Hygiene. Let's face it, earwax happens. Over time, your ear tips can get pretty gross if you don't clean them regularly. And if cleaning doesn't do the trick, it might be time for a replacement. Plus, if you've lost one of the tips or they're just plain worn out, swapping them out is a quick fix to keep your AirPods Pro in tip-top shape.
- Define Nodal Region Unlocking The Secrets Of Geographical Connectivity
- Who Won A Teen Choice Award In 2008 The Ultimate Guide To The Stars And Highlights
How Often Should You Change Them?
There's no hard-and-fast rule here, but most experts recommend replacing your ear tips every 3-6 months, depending on how often you use your AirPods Pro. If you're a heavy user, you might need to replace them more frequently. Think of it like changing the filters in your HVAC system—regular maintenance keeps everything running smoothly.
Tools You’ll Need
Now, before you jump into the process, let's talk about what you'll need. The good news? You don't need much. In fact, you probably already have everything you need lying around your house. Here's a quick list:
- Your AirPods Pro (duh!)
- A clean surface to work on
- A pair of tweezers (optional but helpful)
- New ear tips (if you don't already have them)
That's it! No special tools, no complicated gadgets. Just your AirPods Pro and a steady hand. Oh, and maybe a cup of coffee or tea to keep you company while you work.
Step-by-Step Guide to Changing Ear Tips
Ready to get started? Let's walk through the process step by step. This is super easy, I promise.
Step 1: Turn Off Your AirPods Pro
First things first, turn off your AirPods Pro. You don't want them accidentally connecting to your phone mid-process. To do this, open the case and hold the setup button on the back of the case for about two seconds. Easy peasy.
Step 2: Gently Pull Off the Old Ear Tip
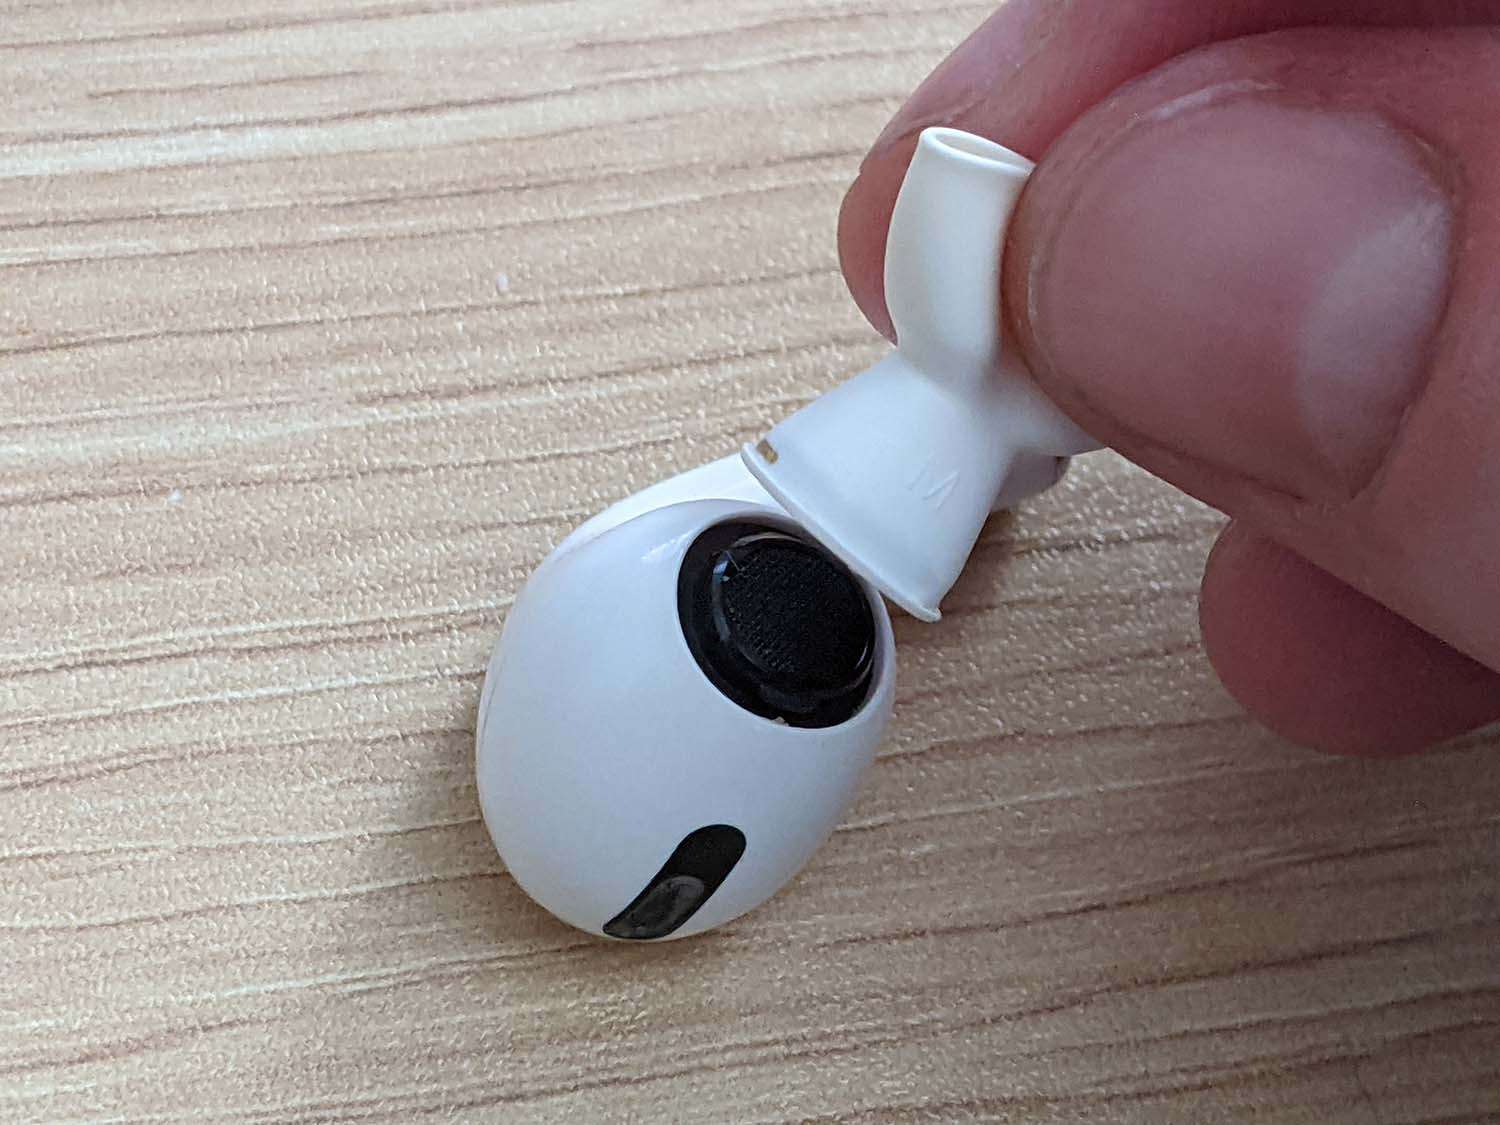
Now, here's where the magic happens. Use your fingers (or tweezers if you're feeling fancy) to gently pull off the old ear tip. Don't yank it off like a band-aid—be gentle. You'll notice that the ear tip is attached to a small stem, so just grip it and twist slightly as you pull. It should come right off.
Step 3: Attach the New Ear Tip
With the old tip off, it's time to put on the new one. Line up the stem of the new ear tip with the opening on your AirPods Pro and gently press it on until you hear a satisfying click. That's it! You've officially changed your ear tip.
Repeat the process for the other earbud, and you're good to go. See? I told you it was easy!
Common Issues and How to Fix Them
Of course, things don't always go smoothly. Here are some common issues you might encounter when changing your AirPods Pro ear tips and how to fix them:
Issue 1: The Ear Tip Won’t Come Off
If the ear tip feels stuck, don't force it. Try using a clean cloth or a soft-bristled brush to gently loosen it. Sometimes a little patience goes a long way.
Issue 2: The New Ear Tip Doesn’t Fit
If your new ear tip doesn’t seem to fit properly, double-check that you’ve got the right size. Remember, AirPods Pro come with small, medium, and large options. If none of them fit, you might want to explore third-party alternatives.
Issue 3: Noise Cancellation Isn’t Working
If you notice that your noise cancellation isn’t working after changing the ear tips, it could be because the seal isn’t tight enough. Make sure the new tip is fully attached and try the fit test in the AirPods Pro app to ensure everything’s working as it should.
Tips and Tricks for Better Ear Tip Care
Changing your ear tips is just one part of keeping your AirPods Pro in great shape. Here are a few tips and tricks to help you take care of them:
- Clean your ear tips regularly with a soft cloth or cotton swab.
- Avoid using harsh chemicals or water to clean them—it could damage the silicone.
- Store your AirPods Pro in their case when not in use to protect the ear tips from dust and debris.
- Experiment with different sizes to find the perfect fit for your ears.
By following these simple tips, you'll extend the life of your AirPods Pro and keep them sounding great for years to come.
Exploring Alternative Ear Tips
Did you know you don’t have to stick with Apple’s ear tips? There are plenty of third-party options available that offer different materials, shapes, and sizes. Some popular alternatives include:
Comply Foam Tips
Comply foam tips are a favorite among audiophiles. They provide a snug fit and superior noise isolation, making them perfect for long listening sessions.
Silicone Gel Tips
If you prefer a softer feel, silicone gel tips might be the way to go. They’re more durable than standard silicone tips and offer a comfortable fit.
Flanged Tips
For those who struggle with finding the right fit, flanged tips might be worth a try. Their unique design helps create a better seal in the ear canal, improving sound quality and noise cancellation.
The Importance of Proper Fit for Sound Quality
Let’s talk about why the fit of your ear tips matters so much when it comes to sound quality. A proper seal ensures that the active noise cancellation (ANC) feature on your AirPods Pro works as intended. Without it, you might notice background noise creeping in or bass notes sounding muffled. Plus, a snug fit means less sound leakage, which is a win-win for both you and anyone around you.
How to Test Your Ear Tip Fit
Not sure if your new ear tips are fitting properly? Use the fit test feature in the AirPods Pro app. It’s super easy and only takes a few seconds. Just open the app, select your AirPods Pro, and follow the on-screen instructions. The app will analyze the seal and let you know if you need to adjust the fit.
Maintaining Your AirPods Pro for Longevity
Changing ear tips is just one part of maintaining your AirPods Pro. Regular cleaning, proper storage, and avoiding drops or impacts are all crucial for keeping them in good condition. Think of your AirPods Pro as an investment—taking care of them now will save you money in the long run.
Final Thoughts: Keep Your AirPods Pro Game Strong
And there you have it, folks! Changing AirPods Pro ear tips is a simple yet essential task that can make a big difference in your listening experience. Whether you're swapping them out for hygiene reasons or just trying to find the perfect fit, the process is quick and easy. Remember to clean them regularly, explore alternative options if needed, and always keep an eye on your fit for optimal sound quality.
So, what are you waiting for? Grab those AirPods Pro, roll up your sleeves, and get to work. And when you're done, don't forget to share your experience in the comments below. Did you find this guide helpful? Have any tips of your own? Let’s keep the conversation going!
- Local 79 Union The Backbone Of Labor Power In Your Community
- May 12 Zodiac Unlocking The Secrets Of Your Star Sign And What It Means For You
How to change AirPods Pro ear tips 9to5Mac
How To Change Ear Tips On Airpods Pro

How to change the ear tips on your AirPods Pro and figure out which
